Quick Start with Searchkit and React instantsearch
This guide will show you how to get started with Searchkit and React Instantsearch components.
If you use Next.js, checkout the Next.js guide for a simpler setup.
Download an Example Project
You can check out a Next.js project with Searchkit here:
curl https://codeload.github.com/searchkit/searchkit/tar.gz/main | \
tar -xz --strip=2 searchkit-main/examples/with-ui-nextjs-react
or view the example codebase on github here (opens in a new tab)
Code Sandbox Example
You can also check out the code sandbox example here:
Quick Start
For this quick start, we are going to run Elasticsearch locally and build a small e-commerce search experience using Searchkit and instantsearch.
Running Elasticsearch
This quick start will need CORS enabled as we will be calling Elasticsearch / Opensearch directly from the browser. See Enable CORS to do this.
Alternatively, you can proxy the Elasticsearch / Opensearch requests. See Proxy Elasticsearch for more details.
Going to use Elasticsearch via Docker for this quick start.
For other options, see Setup Elasticsearch.
Below we are running Elasticsearch with CORS enabled and security disabled. For production, you should enable security and use an API key. See Setup Elasticsearch for more ways of connecting with authentication.
docker pull docker.elastic.co/elasticsearch/elasticsearch:8.6.2
docker network create elastic
docker run --name elasticsearch --net elastic -p 9200:9200 -p 9300:9300 -e "discovery.type=single-node" -e "xpack.security.enabled=false" -e http.cors.enabled=true -e "http.cors.allow-origin='*'" -e http.cors.allow-headers=X-Requested-With,X-Auth-Token,Content-Type,Content-Length,Authorization -e http.cors.allow-credentials=true -e network.publish_host=localhost -e xpack.security.enabled=false docker.elastic.co/elasticsearch/elasticsearch:8.6.2
Index Example E-Commerce Dataset
We are going to use the ecommerce dataset from bestbuy.
Download the sample dataset from sample-data/electronics-ecommerce/bulk.json (opens in a new tab) and index the documents via the bulk API.
curl -H 'Content-Type: application/x-ndjson' -XPOST 'localhost:9200/_bulk?pretty' --data-binary "@bulk.json"This will add 10000 products to the products index.
The bulk API requires a newline delimited JSON file. The last line of the file must be a newline character.
Installation
Installing both the API and instantsearch-client is easy. You can install them with npm or yarn.
For more details on installation and usage, see Installation.
npm install searchkit @searchkit/instantsearch-client react-instantsearchAdding Searchkit & Instantsearch to your React App
Below is a simple example of how to add Searchkit and Instantsearch to your React app.
import React from "react";
import ReactDOM from "react-dom";
import Client from "@searchkit/instantsearch-client";
import Searchkit from "searchkit";
import { InstantSearch, SearchBox, Hits, RefinementList } from "react-instantsearch";

// Create a Searchkit client
// This is the configuration for Searchkit, specifying the fields to attributes used for search, facets, etc.
const sk = new Searchkit({
  connection: {
    host: "http://localhost:9200",
    // cloud_id: "my-cloud-id" // if using Elastic Cloud
    // if you're authenticating with username/password
    // https://www.searchkit.co/docs/guides/setup-elasticsearch#connecting-with-usernamepassword
    //auth: {
    //  username: "elastic",
    //  password: "changeme"
    //},
    // if you're authenticating with api key
    // https://www.searchkit.co/docs/guides/setup-elasticsearch#connecting-with-api-key
    // apiKey: "######"
  },
  search_settings: {
    search_attributes: ['name'],
    result_attributes: ['name', 'description']
  },
})

const searchClient = Client(sk);

const App = () => (
  <InstantSearch indexName="products" searchClient={searchClient}>
    <SearchBox />
    <Hits />
  </InstantSearch>
);

export default App;
Adding Instantsearch theme Stylesheet
You can add the Instantsearch stylesheet via CDN file.
<link rel="stylesheet" href="https://cdn.jsdelivr.net/npm/instantsearch.css@7/themes/satellite-min.css">If using next.js, you can do this in your app by importing it in your pages/_app.tsx file.
import Head from "next/head";

function MyApp({ Component, pageProps }) {
  return (
    <>
      <Head>
        <link rel="stylesheet" href="https://cdn.jsdelivr.net/npm/instantsearch.css@7/themes/satellite-min.css" />
      </Head>
      <Component {...pageProps} />
    </>
  );
}
Then you should see this in your browser:

Customise the results display
The default view of the Hits component is a list of the JSON objects returned by Elasticsearch. You can customise the display of the results by passing a hitComponent prop to the Hits component.
In order to return the name and description, we must specify the field attributes in the search_settings of Searchkit.
  search_settings: {
    search_attributes: ['name'],
    result_attributes: ['name', 'description']
  }
Then we can define a custom hit React Component to return both name and description for each hit.
// define a custom hit React Component
// returning both name and description for each hit
const HitView = ({ hit }) => (
  <div>
    <h3>{hit.name}</h3>
    <p>{hit.description}</p>
  </div>
);

// then in the App function
<Hits hitComponent={HitView} />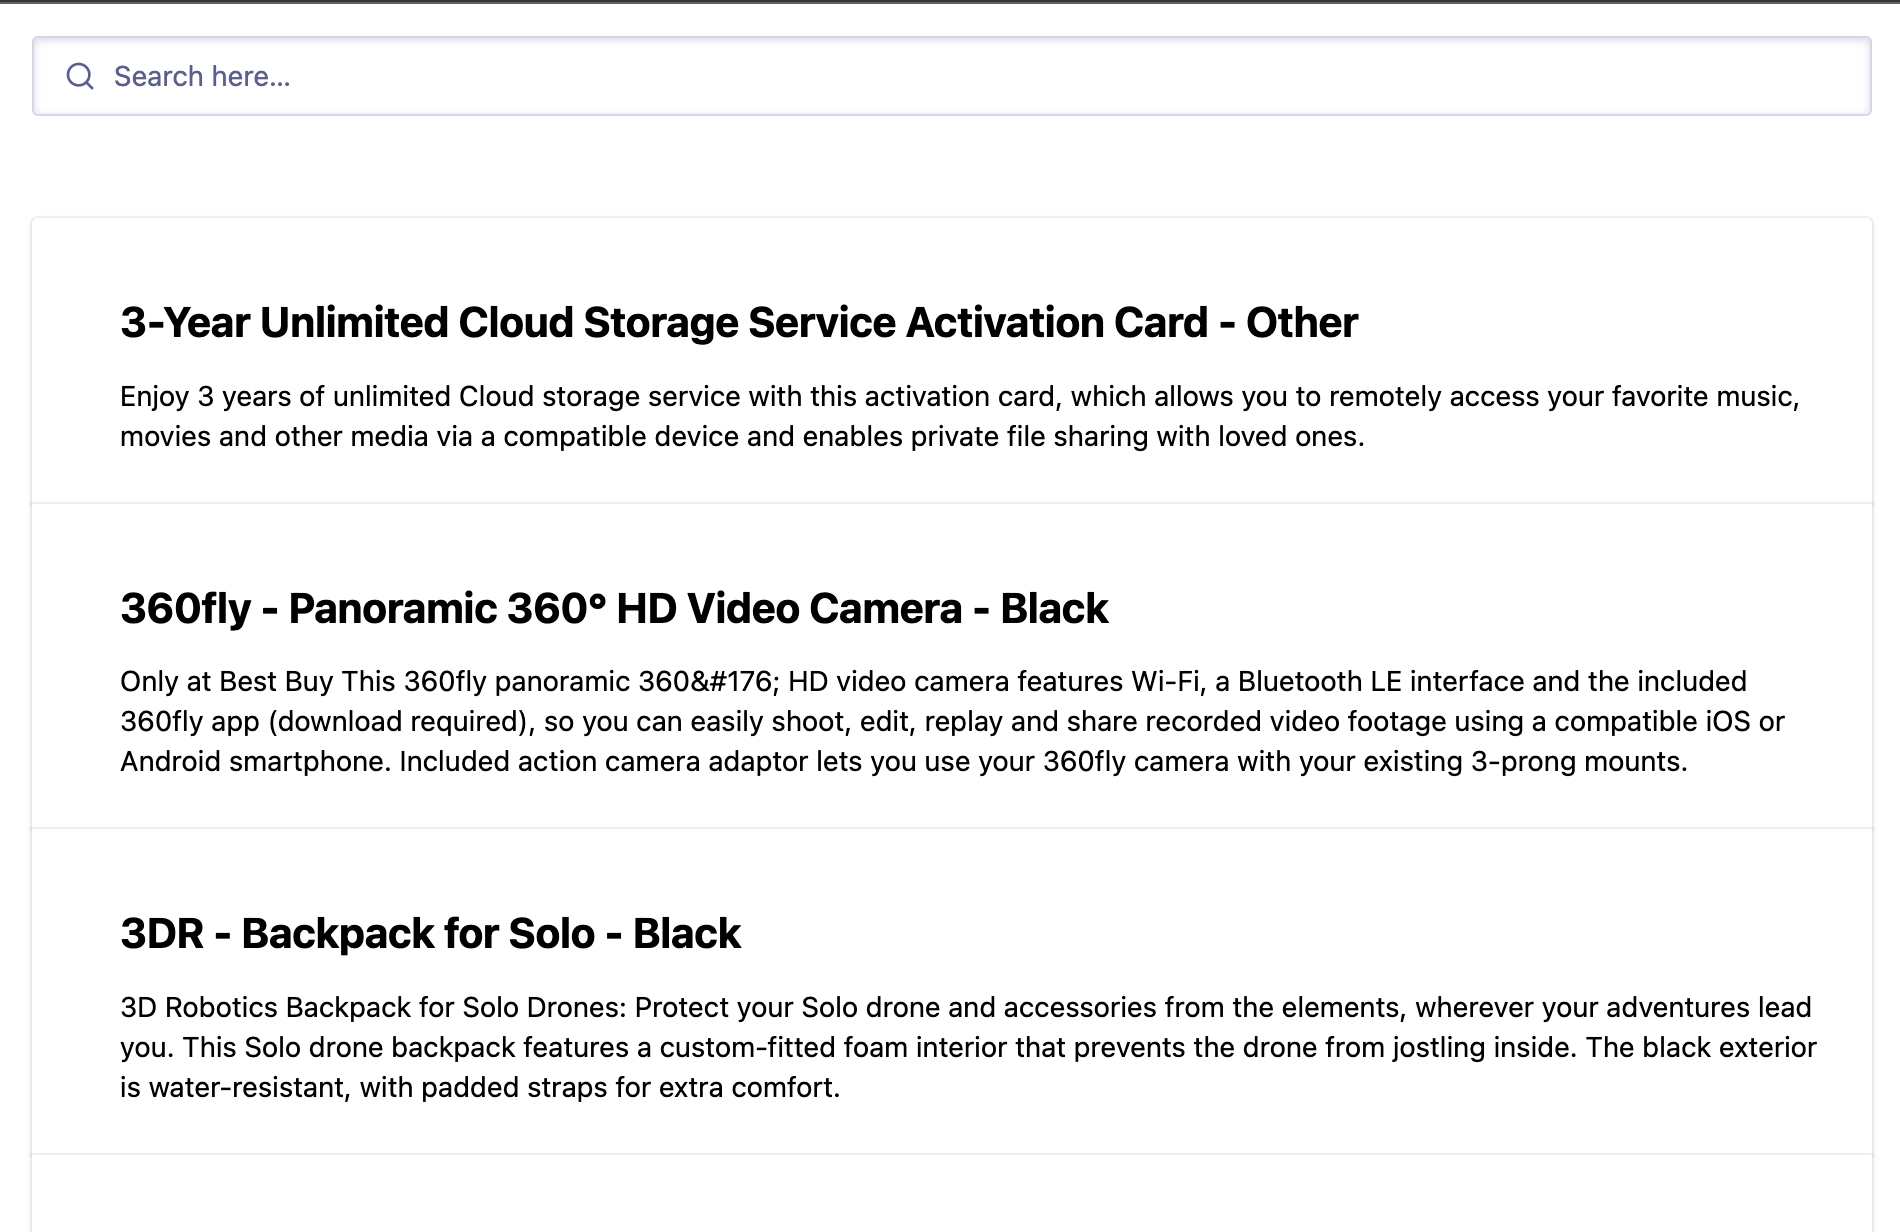
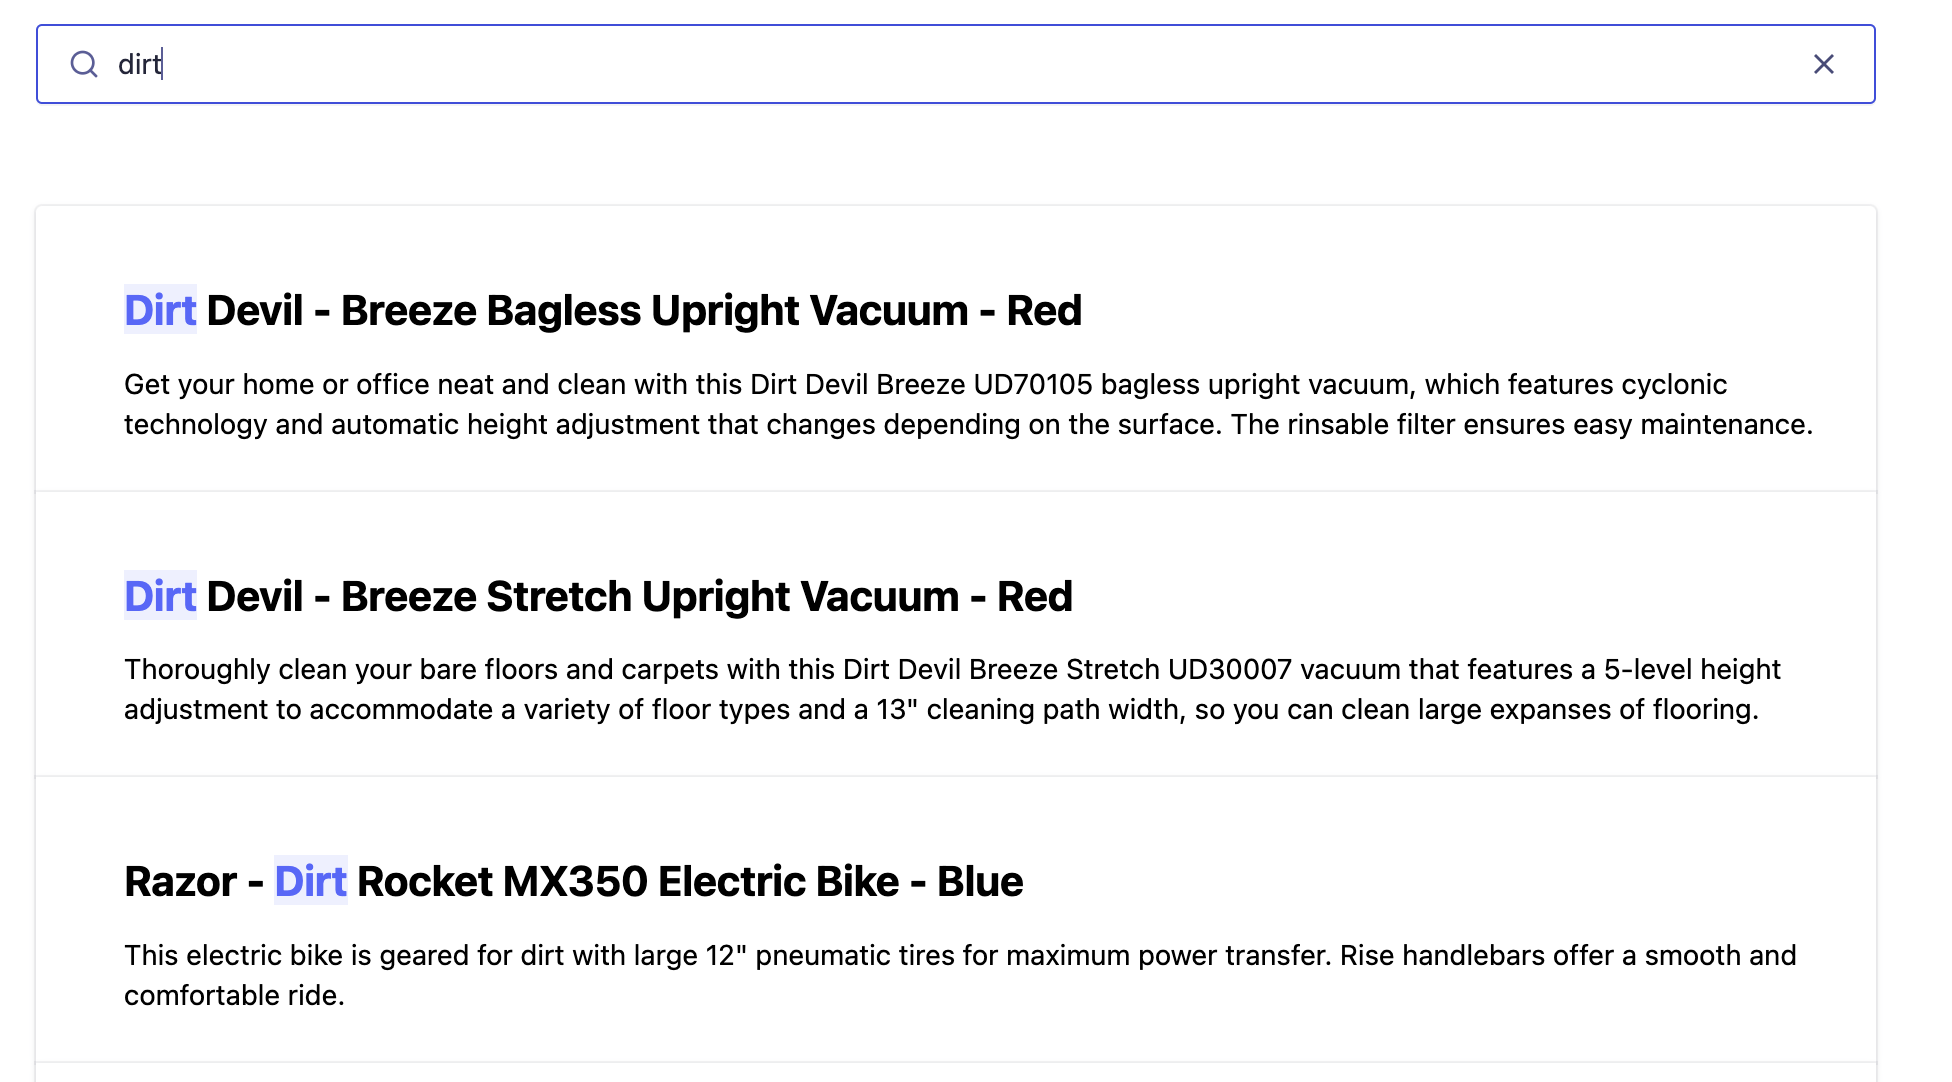
Highlighting & Snippets
Instantsearch and Searchkit provide a way to highlight the search terms in the results. You can also specify the number of characters to display in the snippet.
For short text fields like name, you can use the highlight prop to highlight the search terms in the results. For longer text fields like description, you can use the snippet prop to display a snippet of the text.
First specify the highlight_attributes and snippet_attributes in the search_settings of Searchkit.
  search_settings: {
      search_attributes: ['name'],
      result_attributes: ['name', 'description'],
      highlight_attributes: ['name'],
      snippet_attributes: ['description']
  }
Then you can use the Highlight and Snippet components to highlight and display snippets in the results.
import { Snippet, Highlight } from 'react-instantsearch';

// define a custom hit React Component
// returning both name and description for each hit
const HitView = (props: any) => {
  return (
    <div>
      <h2>
        <Highlight attribute="name" hit={props.hit} />
      </h2>
      <Snippet attribute="description" hit={props.hit} />
    </div>
  );
};
Adjust Query & Relevance
Next we want to customise how results are matched and ranked. This is done by specifying the search_settings in the Searchkit configuration.
Specify search attributes and weights
We want to be able to search by name, description, categories & brand. We also want to give more weight to the name & brand field.
  search_settings: {
      search_attributes: [
        { field: 'name', weight: 3 },
        { field: 'categories', weight: 2 },
        { field: 'brand', weight: 2 },
        'description'
      ],
      result_attributes: ['name', 'description', 'categories', 'brand'],
      highlight_attributes: ['name'],
      snippet_attributes: ['description']
  }
Advanced: Customise Query DSL
Searchkit will use the fields specified in search_attributes and use combined fields (opens in a new tab) to search for the query terms.
You can also customise the query DSL by implementing the getQuery method. This is useful if you want to use a different query type like multi_match (opens in a new tab).
import Client from '@searchkit/instantsearch-client';

const searchClient = Client(sk, {
  getQuery: (query, search_attributes) => {
    return [
      {
        multi_match: {
          query: query,
          fields: search_attributes,
          type: "cross_fields",
        },
      },
    ];
  }
});
Advanced: Semantic Search
You might want to transform the query terms into a vector embedding before searching. This is useful if you want to do semantic search.
Searchkit provides a way to customise the whole search DSL. This is useful if you want to do a vector search via KNN.
import Client from '@searchkit/instantsearch-client';

const searchClient = Client(sk, {
  getKnnQuery(query, search_attributes, config) {
    return {
      field: 'dense-vector-field',
      k: 10,
      num_candidates: 100,
      // supported in Elasticsearch 8.7+
      query_vector_builder: {
        text_embedding: {
          model_id: 'cookie_model',
          model_text: query
        }
      }
    }
  }
});
Advanced: Searching Nested Fields
Currently Searchkit does not support nested fields as searchable attributes as a configuration, however you can use the getQuery method to customise the query DSL to search nested fields.
import Client from '@searchkit/instantsearch-client';

const searchClient = Client(sk, {
  getQuery: (query) => {
    return {
      bool: {
        must: [
          {
            nested: {
              path: "user",
              query: {
                combined_fields: {
                  query: query,
                  fields: ["user.first"]
                }
              }
            }
          }
        ]
      }
    };
  }
});
Refinements
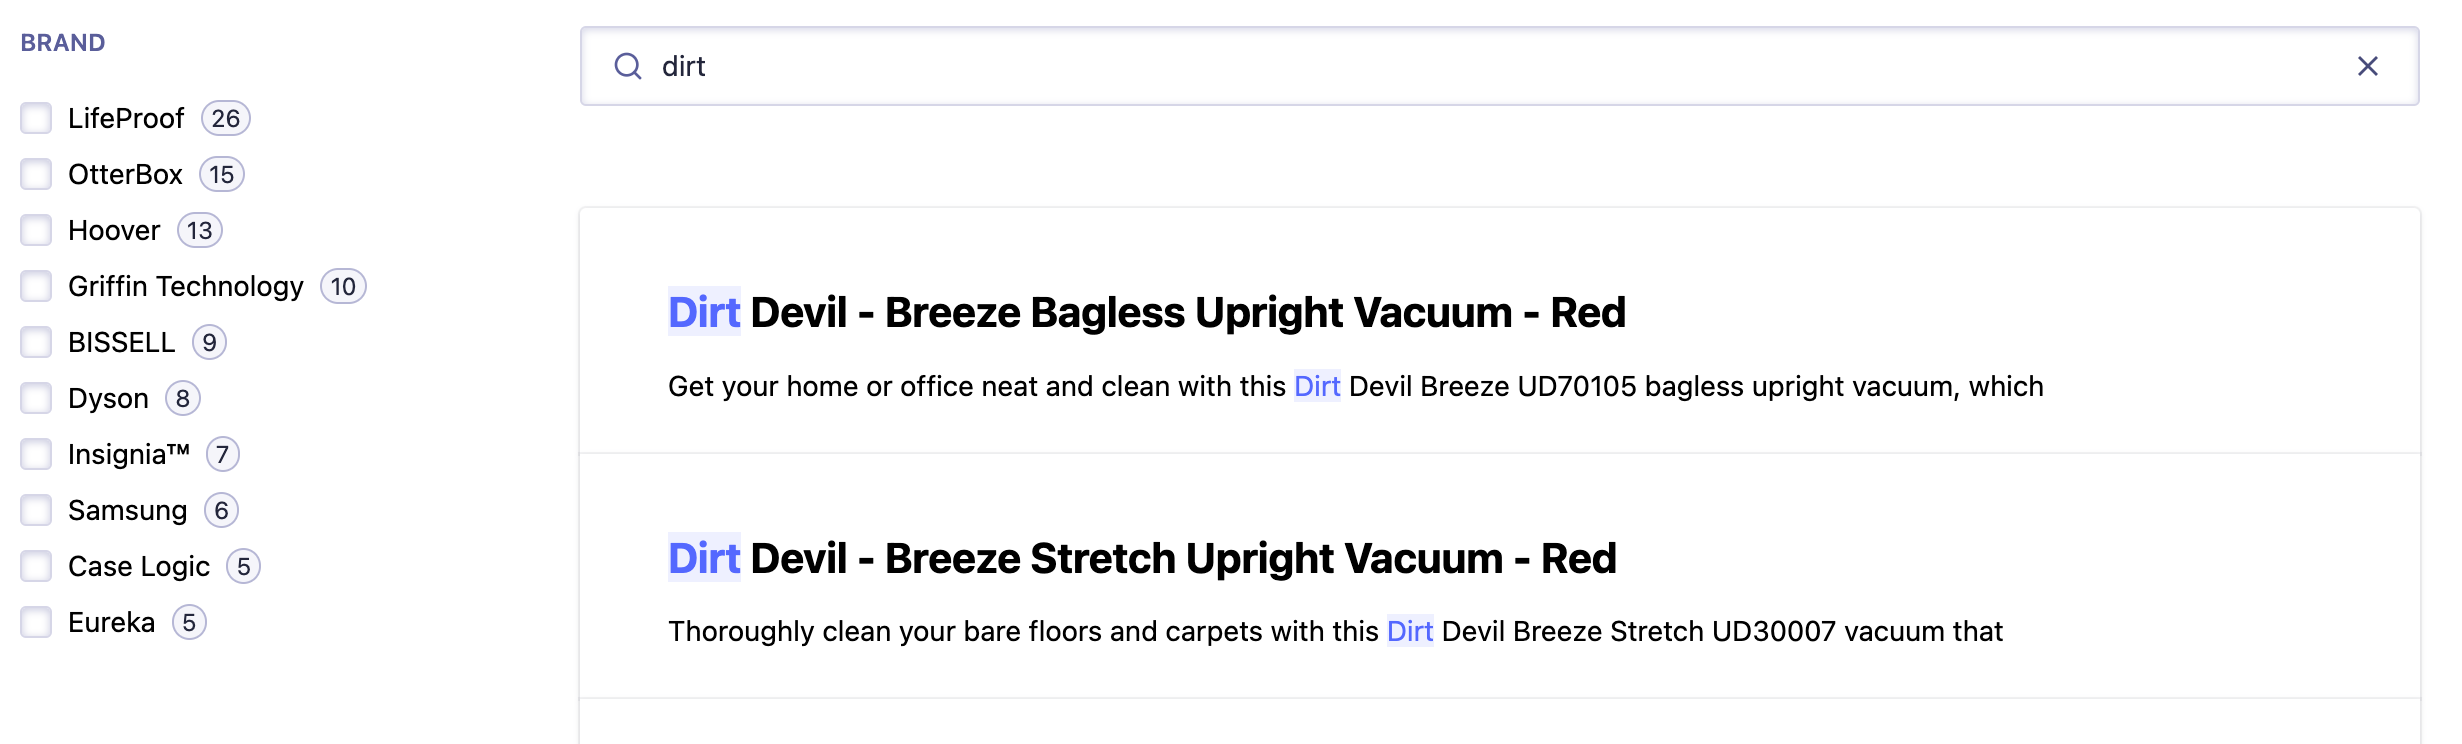
Refinements (or also known as facets) allow your users to narrow down their search results. You can easily add refinements with the many refinement components provided by Instantsearch.
In this example we are going to add a brand refinement facet. We will also add a categories refinement facet to show how to use a hierarchical facet.
Brand Refinement Facet
First you must add the brand field to the search_settings in Searchkit.
The field must be a keyword field in Elasticsearch. By default, Elasticsearch will create a keyword field for each text field. To use, you must specify the field name with the .keyword suffix.
  search_settings: {
      search_attributes: [
        { field: 'name', weight: 3 },
        { field: 'categories', weight: 2 },
        { field: 'brand', weight: 2 },
        'description'
      ],
      result_attributes: ['name', 'description', 'categories', 'brand'],
      highlight_attributes: ['name'],
      snippet_attributes: ['description'],
      facet_attributes: [
        { attribute: 'brand', field: 'brand.keyword', type: "string" }
      ]
  }
Then you can add the RefinementList component to the App function.
import { InstantSearch, SearchBox, Hits, RefinementList } from 'react-instantsearch';

const App = () => (
  <InstantSearch indexName="products" searchClient={searchClient}>
    <SearchBox />
    <RefinementList attribute="brand" />
    <Hits />
  </InstantSearch>
);
Show more
Refinement list will display the top 10 brands by default. You can use the showMore prop to show more brands.
<RefinementList attribute="brand" showMore />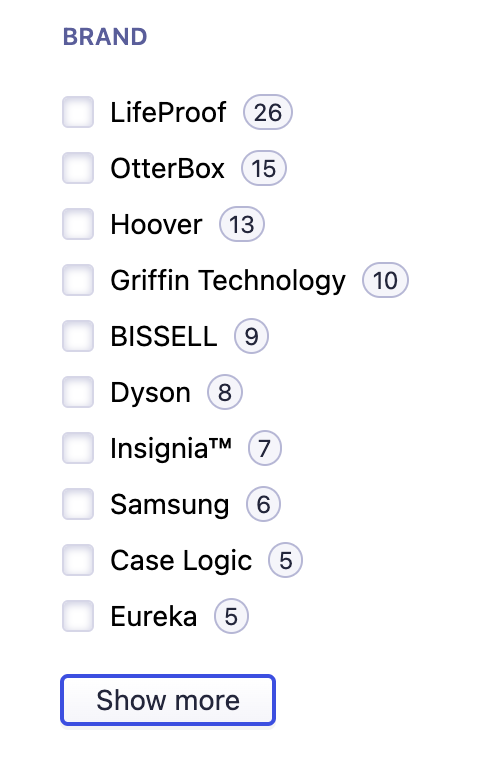
Searchable
Refinement list will also allow you to search for a specific brand.
<RefinementList attribute="brand" searchable />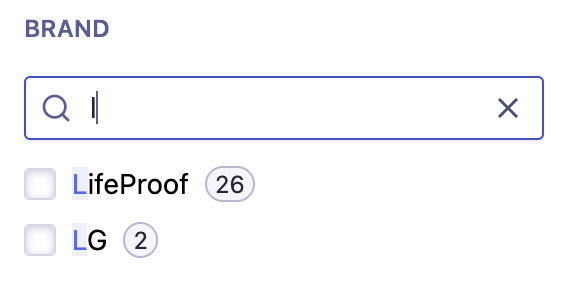
and many more options are available for refinement + components for different types of refinements.
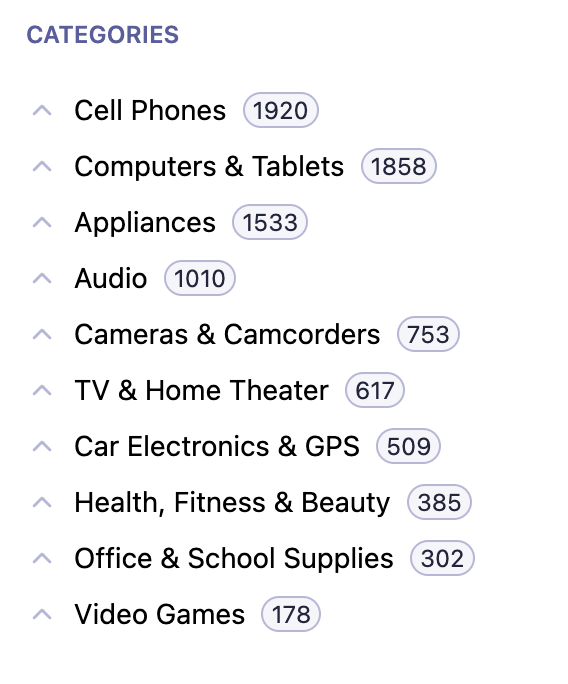
Hierarchical Facet
One of the most common use cases for refinements is to filter by categories. You can use a hierarchical facet to display the categories in a tree structure.
First you must add the categories levels to the search_settings in Searchkit.
  search_settings: {
      search_attributes: [
        { field: 'name', weight: 3 },
        { field: 'categories', weight: 2 },
        { field: 'brand', weight: 2 },
        'description'
      ],
      result_attributes: ['name', 'description', 'categories', 'brand'],
      highlight_attributes: ['name'],
      snippet_attributes: ['description'],
      facet_attributes: [
        { attribute: 'brand', field: 'brand.keyword', type: "string" },
        { attribute: 'categories_lvl0', field: 'hierarchicalCategories.lvl0.keyword', type: "string" },
        { attribute: 'categories_lvl1', field: 'hierarchicalCategories.lvl1.keyword', type: "string" },
        { attribute: 'categories_lvl2', field: 'hierarchicalCategories.lvl2.keyword', type: "string" }
      ]
  }
Then you can add the HierarchicalMenu component to the App function.
import { InstantSearch, SearchBox, Hits, RefinementList, HierarchicalMenu } from 'react-instantsearch';

const App = () => (
  <InstantSearch indexName="products" searchClient={searchClient}>
    <SearchBox />
    <RefinementList attribute="brand" />
    <HierarchicalMenu
      attributes={[
        'hierarchicalCategories.lvl0',
        'hierarchicalCategories.lvl1',
        'hierarchicalCategories.lvl2',
      ]}
    />
    <Hits />
  </InstantSearch>
);
and then you should see the categories in a tree structure.
Other refinement Components
There are many other refinement components available in Instantsearch. You can find the full list of refinement components here.
Nested Fields support
Searchkit supports nested fields for refinements. Read more about nested fields here.
{
  facet_attributes: [
    {
      attribute: 'marketplace.supplier',
      field: 'supplier.keyword',
      type: 'string',
      nestedPath: 'marketplace'
    }
  ]
}
Numeric based Refinement
Numeric based refinements are useful if you want to filter by price or other numeric values.
In this example we are going to add a numeric refinement for price.
First you must add the price field to the search_settings in Searchkit.
  search_settings: {
    search_attributes: [
      { field: 'name', weight: 3 },
      { field: 'categories', weight: 2 },
      { field: 'brand', weight: 2 },
      'description'
    ],
    result_attributes: ['name', 'description', 'categories', 'brand'],
    highlight_attributes: ['name'],
    snippet_attributes: ['description'],
    facet_attributes: [
      { attribute: 'brand', field: 'brand.keyword', type: "string" },
      { attribute: 'categories_lvl0', field: 'hierarchicalCategories.lvl0.keyword', type: "string" },
      { attribute: 'categories_lvl1', field: 'hierarchicalCategories.lvl1.keyword', type: "string" },
      { attribute: 'categories_lvl2', field: 'hierarchicalCategories.lvl2.keyword', type: "string" },
      { attribute: 'price', field: 'price', type: "numeric" }
    ]
  }
Then you can add the RangeInput component to the App function.
import { InstantSearch, SearchBox, Hits, RefinementList, HierarchicalMenu, RangeInput } from 'react-instantsearch';

const App = () => (
  <InstantSearch indexName="products" searchClient={searchClient}>
    <SearchBox />
    <RefinementList attribute="brand" />
    <HierarchicalMenu
      attributes={[
        'hierarchicalCategories.lvl0',
        'hierarchicalCategories.lvl1',
        'hierarchicalCategories.lvl2',
      ]}
    />
    <RangeInput attribute="price" />
    <Hits />
  </InstantSearch>
);
Then you should see a range input to adjust from and to pricing.
Filter Attributes
Filter attributes are attributes that are used to filter the search results.
Filters are useful for fields that you do not want facets for, but you want to be able to filter by.
An example of this could be a date field.
TODO: Add example
Pagination & Size
Next we are going to add pagination and size to the search results.
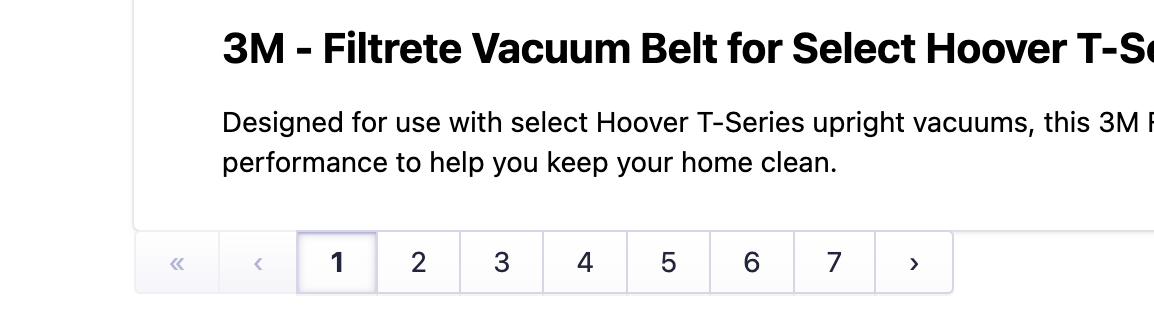
Pagination
Pagination is useful if you want to show more pages for your results.
import { InstantSearch, SearchBox, Hits, RefinementList, HierarchicalMenu, NumericMenu, Pagination } from 'react-instantsearch';

const App = () => (
  <InstantSearch indexName="products" searchClient={searchClient}>
    <SearchBox />
    <RefinementList attribute="brand" />
    <HierarchicalMenu
      attributes={[
        'hierarchicalCategories.lvl0',
        'hierarchicalCategories.lvl1',
        'hierarchicalCategories.lvl2',
      ]}
    />
    <NumericMenu attribute="price" items={[
      { label: 'All' },
      { label: 'Less than $10', end: 10 },
      { label: '$10 to $100', start: 10, end: 100 },
      { label: '$100 to $500', start: 100, end: 500 },
      { label: 'More than $500', start: 500 },
    ]} />
    <Hits />
    <Pagination />
  </InstantSearch>
);
Size
You can adjust the number of results per page by adding the Configure component.
import { InstantSearch, SearchBox, Hits, RefinementList, HierarchicalMenu, NumericMenu, Pagination, Configure } from 'react-instantsearch';

const App = () => (
  <InstantSearch indexName="products" searchClient={searchClient}>
    <Configure hitsPerPage={15} />
    <SearchBox />
    <RefinementList attribute="brand" />
    <HierarchicalMenu
      attributes={[
        'hierarchicalCategories.lvl0',
        'hierarchicalCategories.lvl1',
        'hierarchicalCategories.lvl2',
      ]}
    />
    <NumericMenu attribute="price" items={[
      { label: 'All' },
      { label: 'Less than $10', end: 10 },
      { label: '$10 to $100', start: 10, end: 100 },
      { label: '$100 to $500', start: 100, end: 500 },
      { label: 'More than $500', start: 500 },
    ]} />
    <Configure hitsPerPage={15} />
    <Hits />
    <Pagination />
  </InstantSearch>
);
Sorting
Sorting is useful if you want to sort the results by a specific field.
TODO: Add example
Query Rules
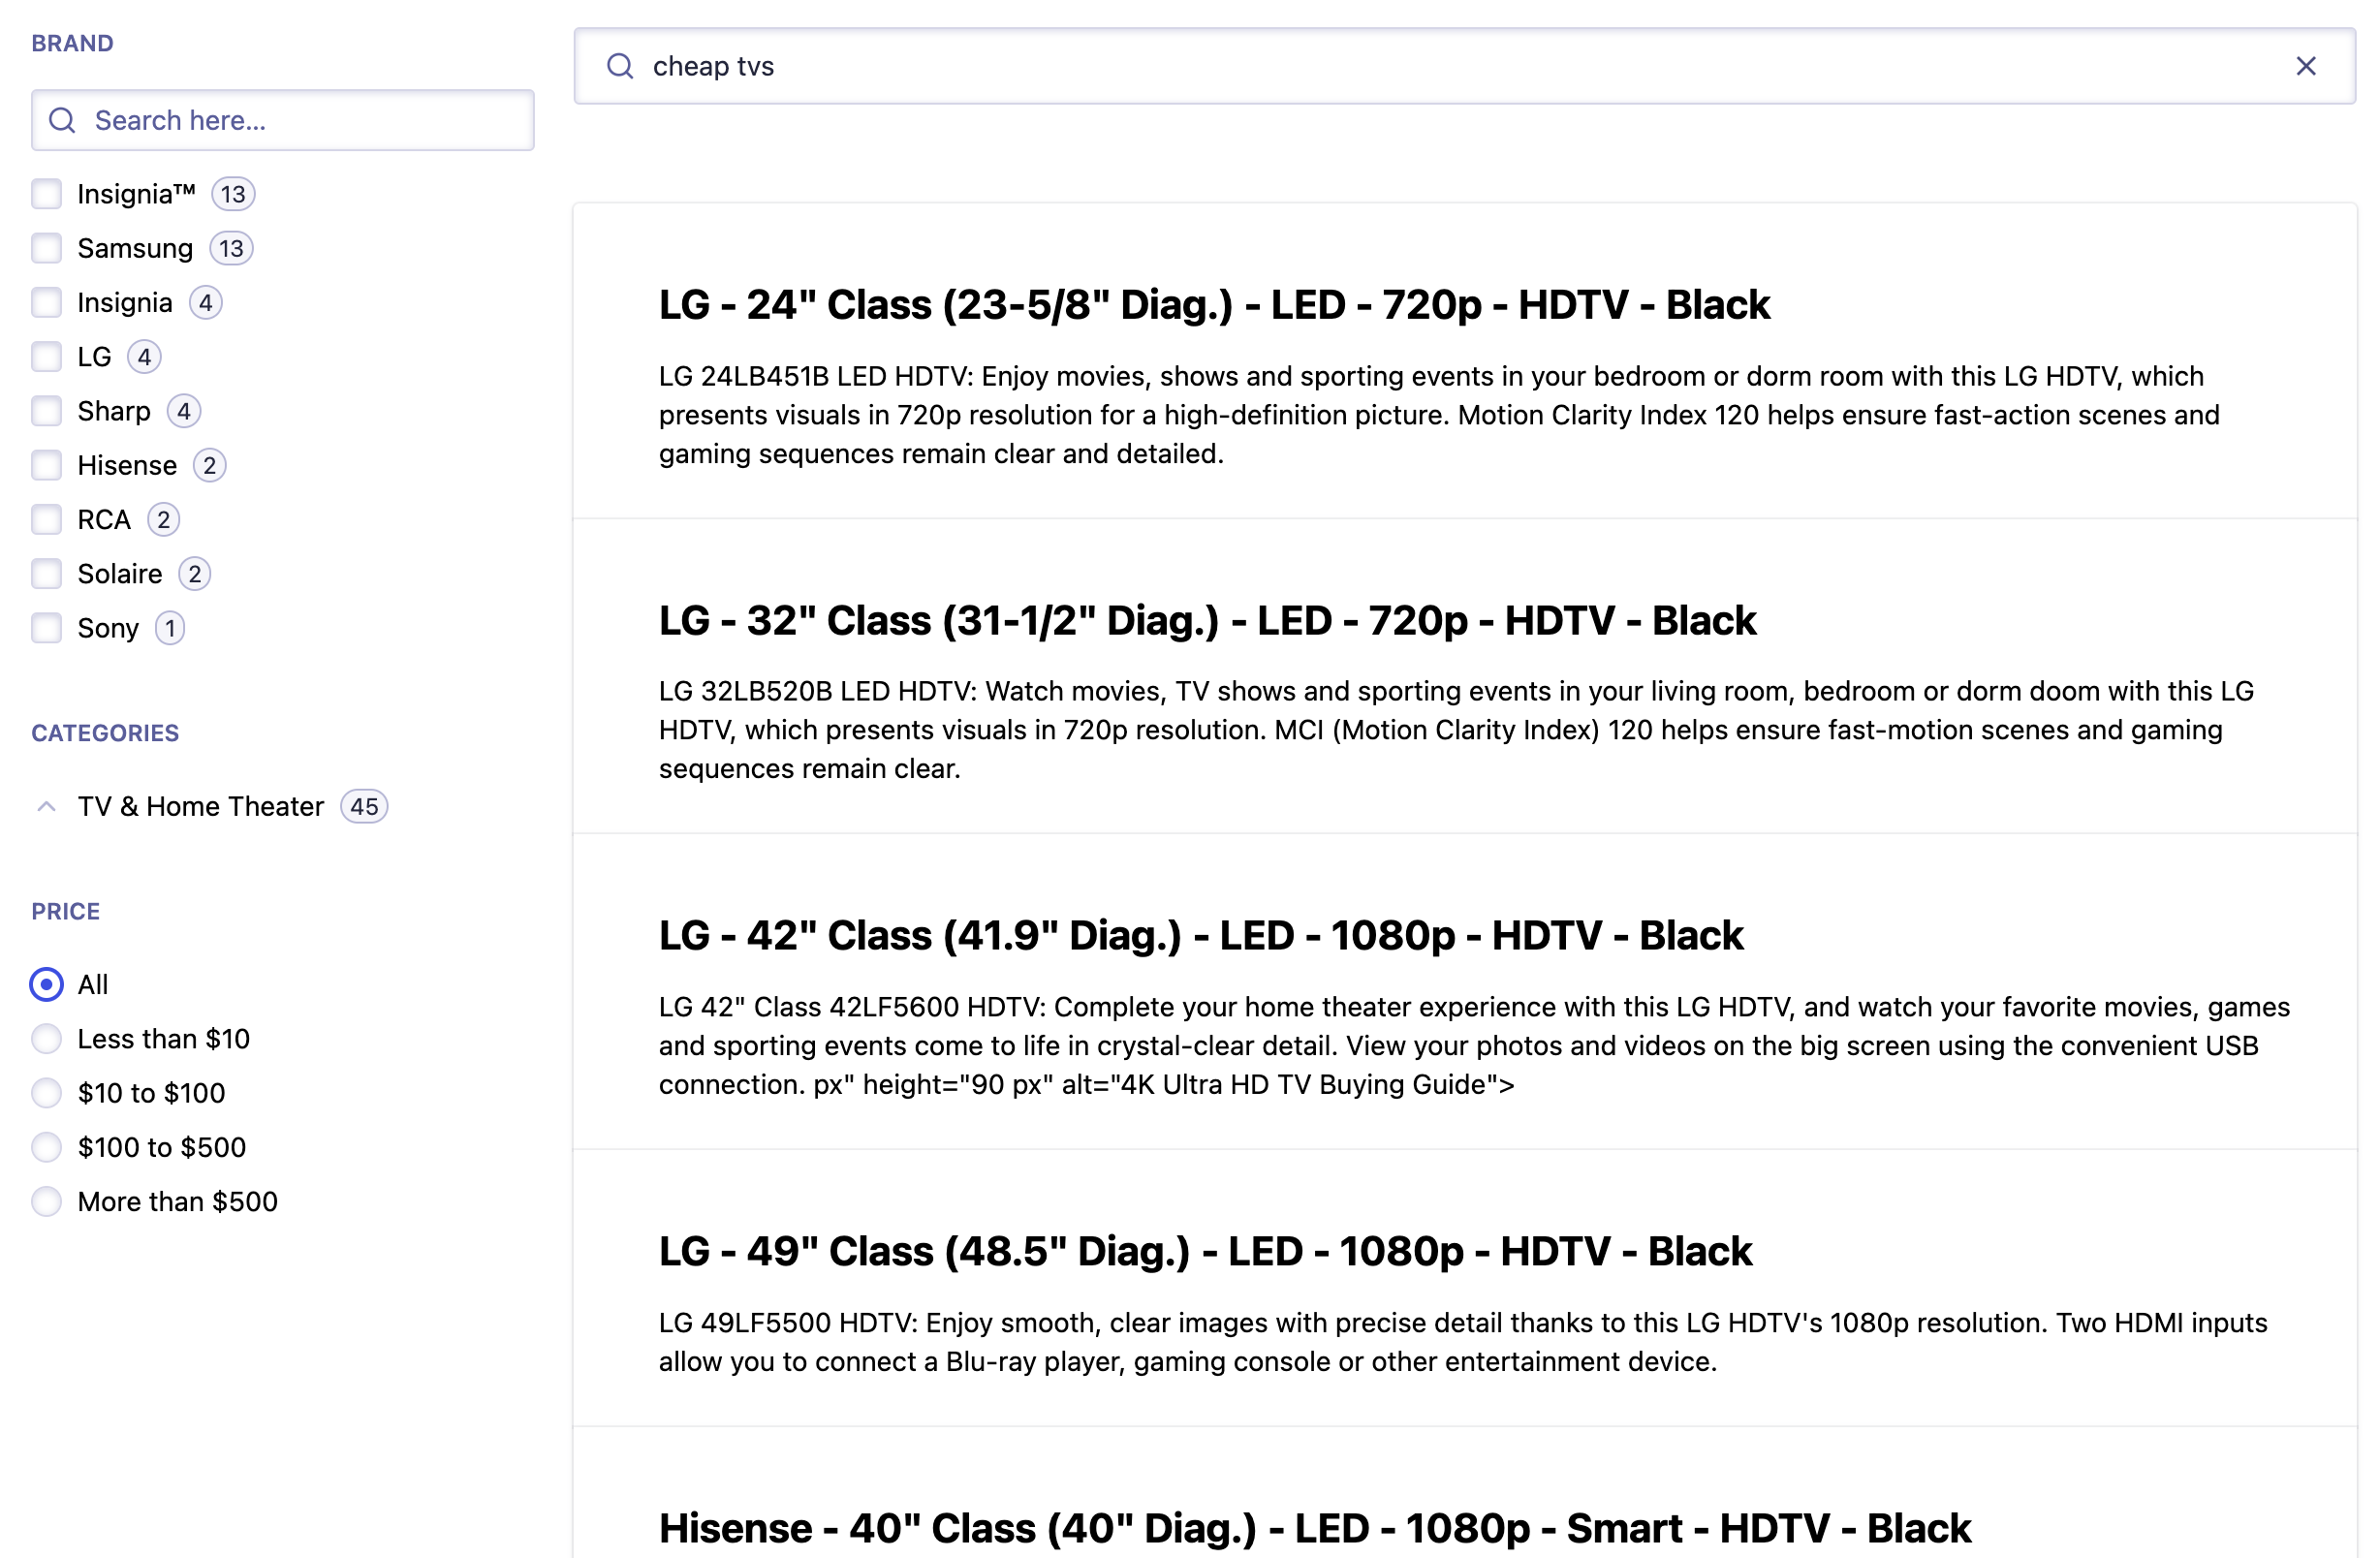
Query rules can help you customize the search results based on the user's query.
To illustrate their use, we will add a query rule that will boost the results for the query "cheap tvs".
Setting up the query rule
Add a query rule to Searchkit search_settings
When the customer types in "cheap tvs", the query rule will be applied and the results will be filtered to be televisions and price range between 0 to 500, and the results for the brand LG will be boosted.
  search_settings: {
    // ... other settings
    query_rules: [
      {
        id: 'cheap-tvs', // needs to be unique
        conditions: [
          [
            { // true when the query is "cheap tvs"
              context: 'query',
              value: 'cheap tvs',
              match_type: 'exact'
            }
          ]
        ],
        actions: [
          { // update the query to be empty
            action: 'QueryRewrite',
            query: ''
          },
          { // filter the results to be televisions and price range between 0 to 500
            action: 'QueryFilter',
            query: 'price:[0 TO 500] AND categories:TVs'
          },
          { // boost the results for the brand LG
            action: 'QueryBoost',
            query: 'brand:LG',
            weight: 10
          }
        ]
      }
    ]
  }
Show facets depending on query or filters
Another example of query rules is to show different facets depending on the query or filters.
When a customer selects TV category, we will display the brand facet.
  search_settings: {
    // ... other settings
    query_rules: [
      { // this rule is to control which facets are displayed and in which order
        id: 'default-state',
        conditions: [[]],
        actions: [
          {
            action: 'RenderFacetsOrder',
            facetAttributesOrder: [
              'categories.lvl0',
              'categories.lvl1',
              'categories.lvl2',
              'price'
            ]
          }
        ]
      },
      {
        id: 'tv-categories',
        conditions: [
          [
            {
              context: 'filterPresent',
              values: [
                {
                  attribute: 'categories.lvl1',
                  value: 'TV & Home Theater > TVs'
                }
              ]
            }
          ]
        ],
        actions: [
          {
            action: 'RenderFacetsOrder',
            facetAttributesOrder: [
              'categories.lvl0',
              'categories.lvl1',
              'categories.lvl2',
              'brand', // show the brand facet
              'price'
            ]
          }
        ]
      }
    ]
  }
on the frontend, you need to use the DynamicWidgets component to control which facets are displayed, based on the query rules.
import { DynamicWidgets } from 'react-instantsearch'

// in the app component

<DynamicWidgets>
  <RefinementList attribute="brand" />
  <HierarchicalMenu
    attributes={[
      'hierarchicalCategories.lvl0',
      'hierarchicalCategories.lvl1',
      'hierarchicalCategories.lvl2',
    ]}
  />
  <NumericMenu attribute="price" items={[
    { label: 'All' },
    { label: 'Less than $10', end: 10 },
    { label: '$10 to $100', start: 10, end: 100 },
    { label: '$100 to $500', start: 100, end: 500 },
    { label: 'More than $500', start: 500 },
  ]} />
</DynamicWidgets>
Display Banner based on query
Another example of query rules is to display a banner based on the query.
This could be used to display a banner with more TV info when the customer selects the TV category.
  search_settings: {
    // ... other settings
    query_rules: [
      {
        id: 'tv-categories',
        conditions: [
          [
            {
              context: 'filterPresent',
              values: [
                {
                  attribute: 'categories.lvl1',
                  value: 'TV & Home Theater > TVs'
                }
              ]
            }
          ]
        ],
        actions: [
          {
            action: 'RenderUserData',
            userData: JSON.stringify({
              title: 'We have TVs!',
              body: 'Check out our TVs',
              url: 'https://www.samsung.com'
            })
          }
        ]
      }
    ]
  }
on the frontend, you use the useQueryRules hook to display the banner.
import { useQueryRules } from 'react-instantsearch'

const QueryRulesBanner = () => {
  const {items} = useQueryRules({})
  if (items.length === 0) {
    return null
  }

  return (
    <div className="query-rules">
      {items.map((item) => (
        <div key={item.objectID} className="query-rules__item">
          <a href={item.url}>
            <b className="query-rules__item-title">{item.title}</b>
            <span className="query-rules__item-description">{item.body}</span>
          </a>
        </div>
      ))}
    </div>
  )
}

const App = () => (
  <InstantSearch indexName="products" searchClient={searchClient}>
    {/* ... other components */}
    <QueryRulesBanner />
  </InstantSearch>
);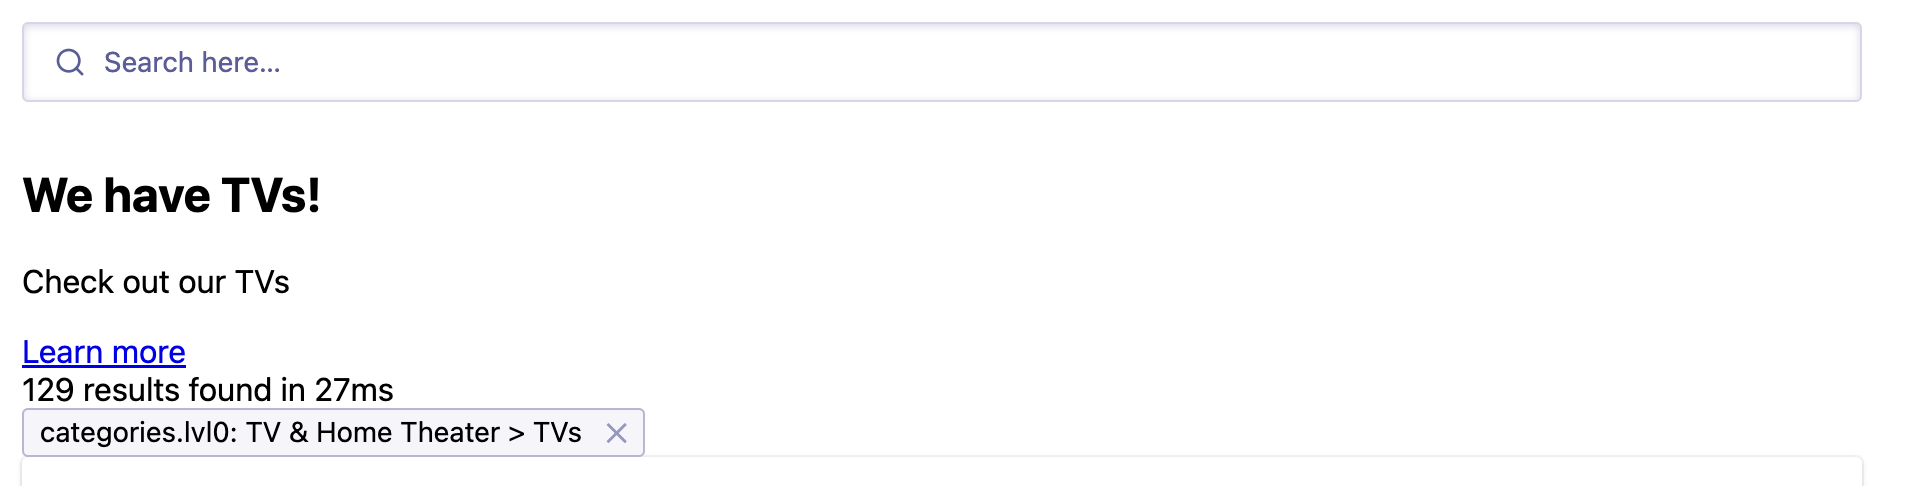
and the banner will be displayed when the customer selects the TV category.
Query Rules Next Steps
Query rules are super amazing! Read more about them in Query Rules.
More Conditions not covered in this guide
- Context - Activate certain actions with context based on the user (segments, location, a/b experiment etc)
More Actions not covered in this guide
- Pin Results - Pin certain results to the top, regardless of the ranking. This is useful if you want to show a specific product in the search results.
Follow the query rules guide to add query rules to your search.
Other Search Features
We covered the most common search features, but there are many more features that you can add to your search.
Next Steps
Now you have built your Search UI, before you go to production, you should proxy your Elasticsearch cluster to make it secure, rather than exposing it to the public. Searchkit makes this simple. You can read more about it in Proxying Elasticsearch.